It’s really easy to create simple APIs on Azure with App Functions. In some cases, you want to protect them using Authentication. This usually done with an App Registration, that has permissions to access the API. Pretty simple, but not that easy to accomplish. These are the steps how to configure this.
Disclaimer
- I have very little to no experience with Azure, so I might be stating the obvious. I wrote these steps down when I was doing research, reading documentation and just trying things out. It’s very well possible that is actually straight forward, but it wasn’t for me and I did not find any step by step procedure.
- This post was written in December 2022. It is possible the layout or menu items have been renamed and/or moved in the UI. I assume the general steps will still be applicable in the future.
Create Azure function
- Create Function App
- Add a function to the newly created Function app - select the
HttpTriggertemplate for building a REST endpoint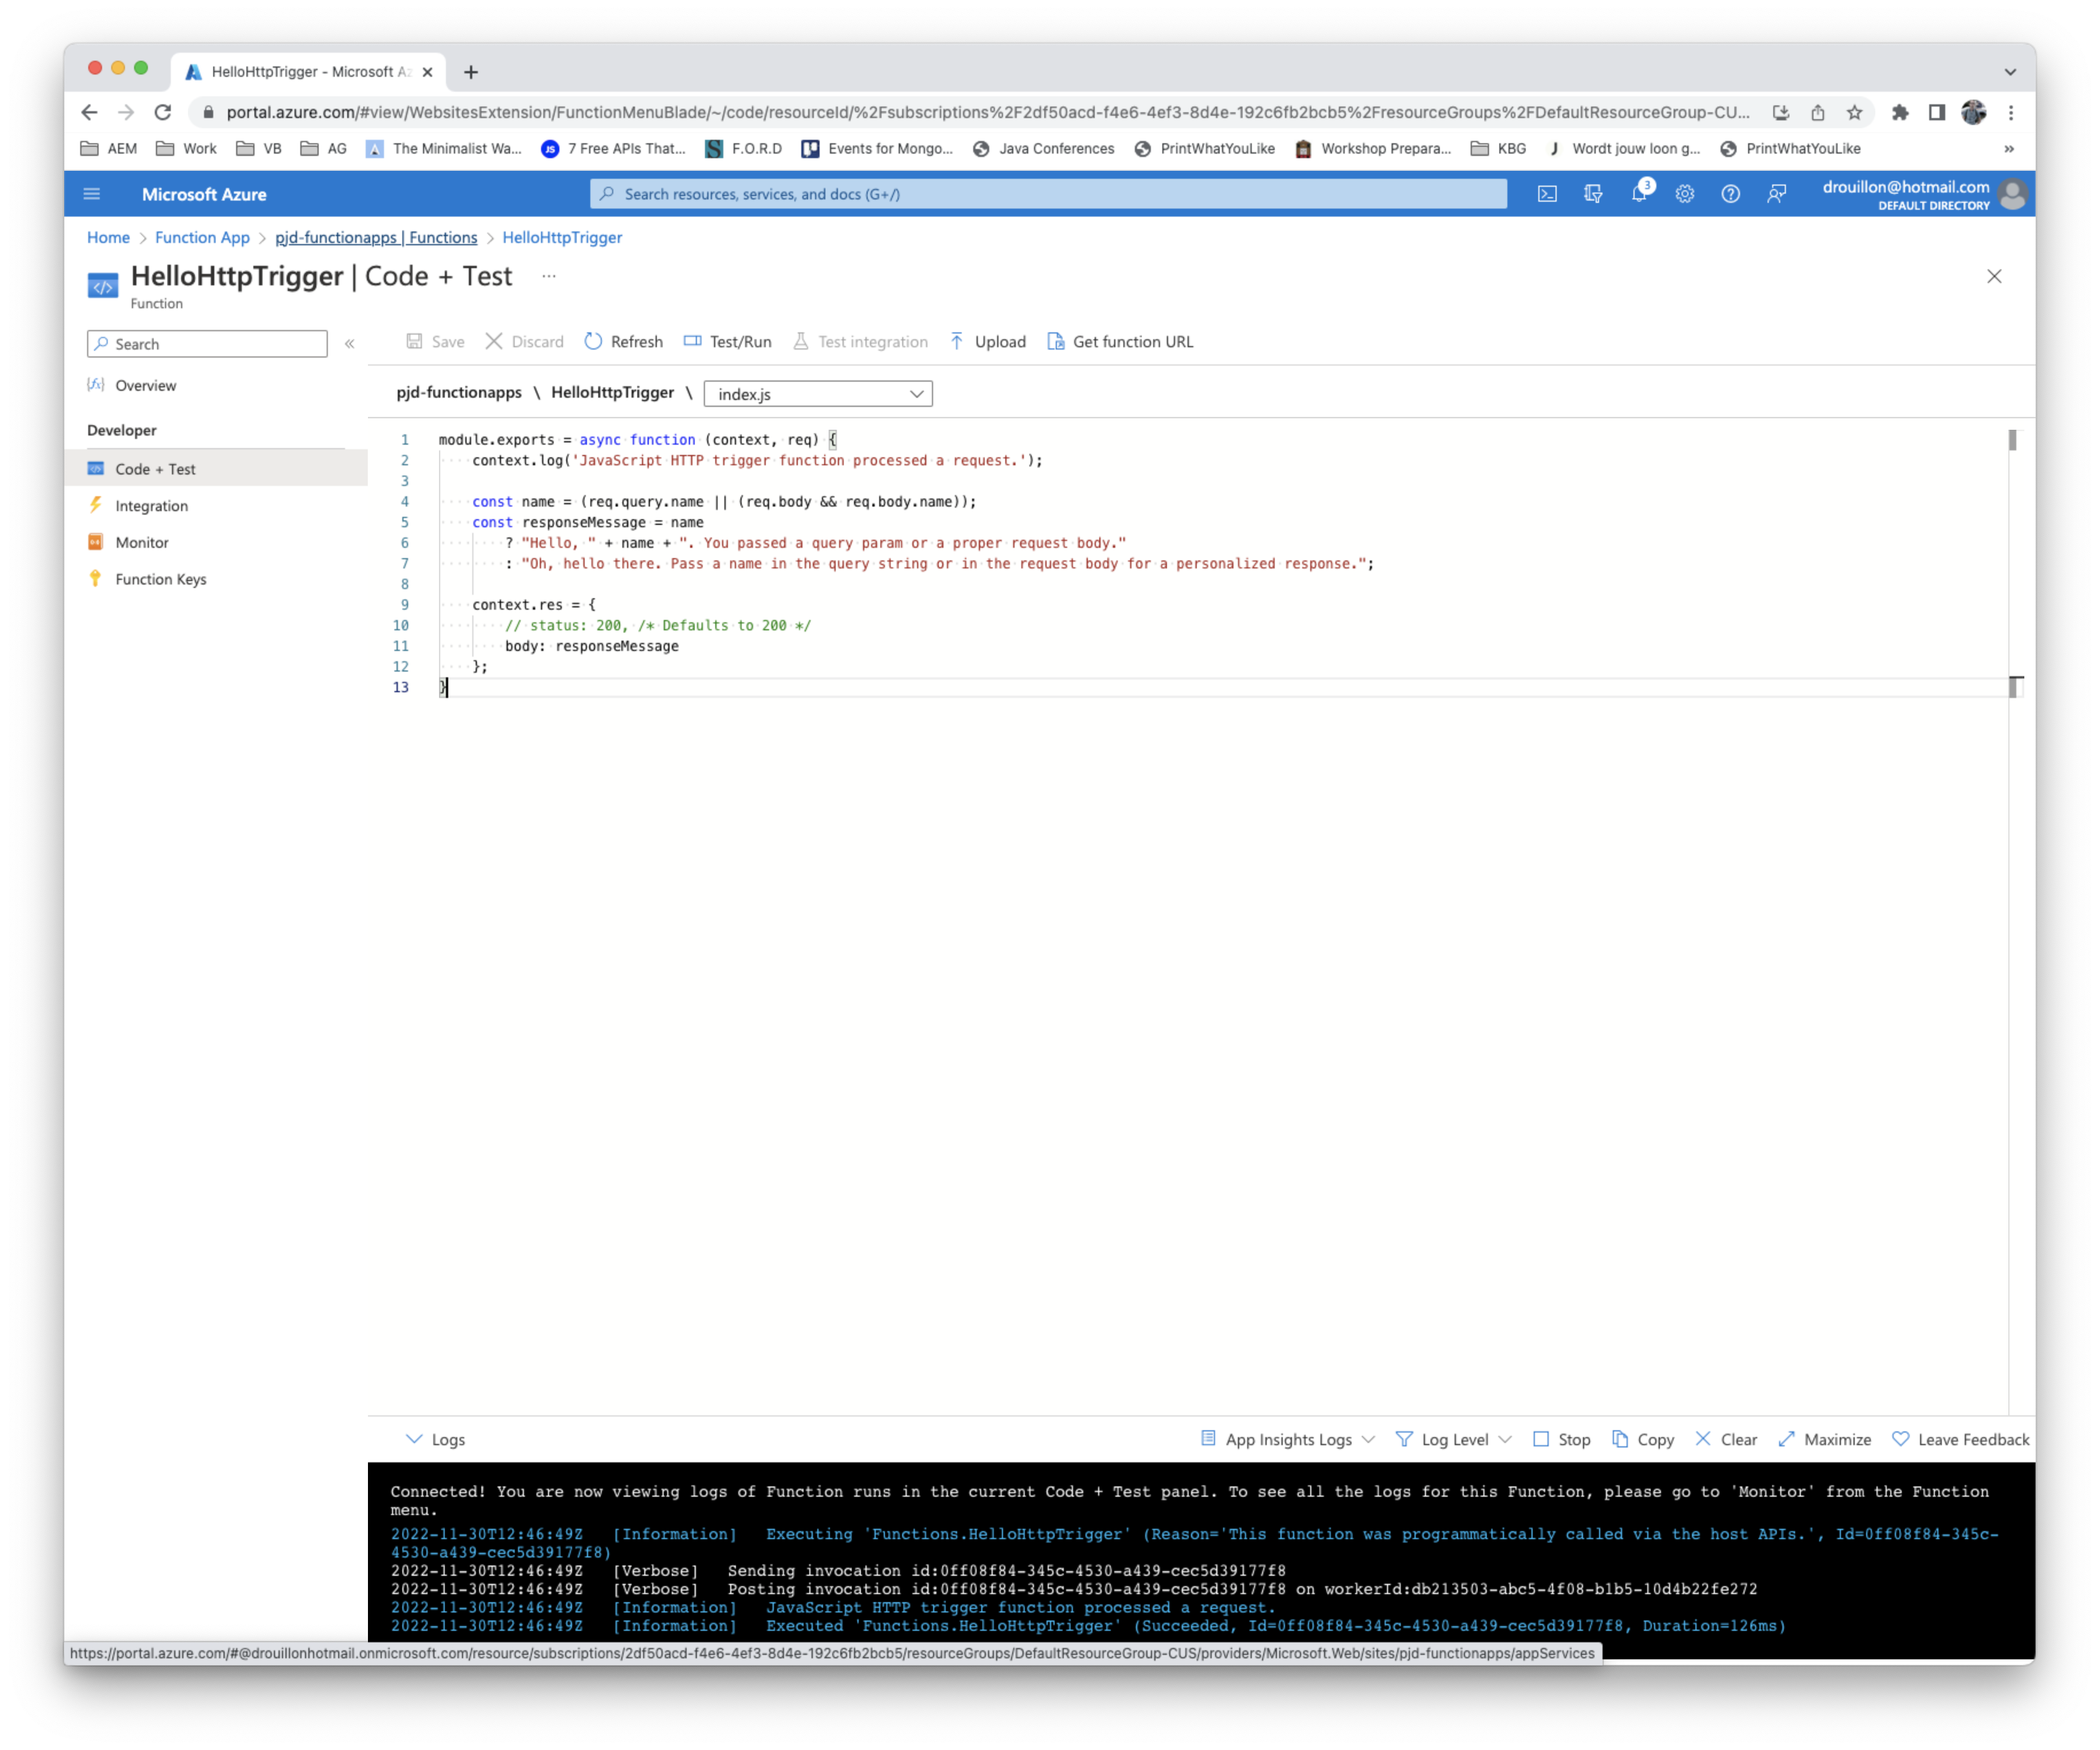
- Check
Test/Runand get the function url for further testing - Customize the code and test it
- Check if it’s working and you get the desired response
Add Authentication
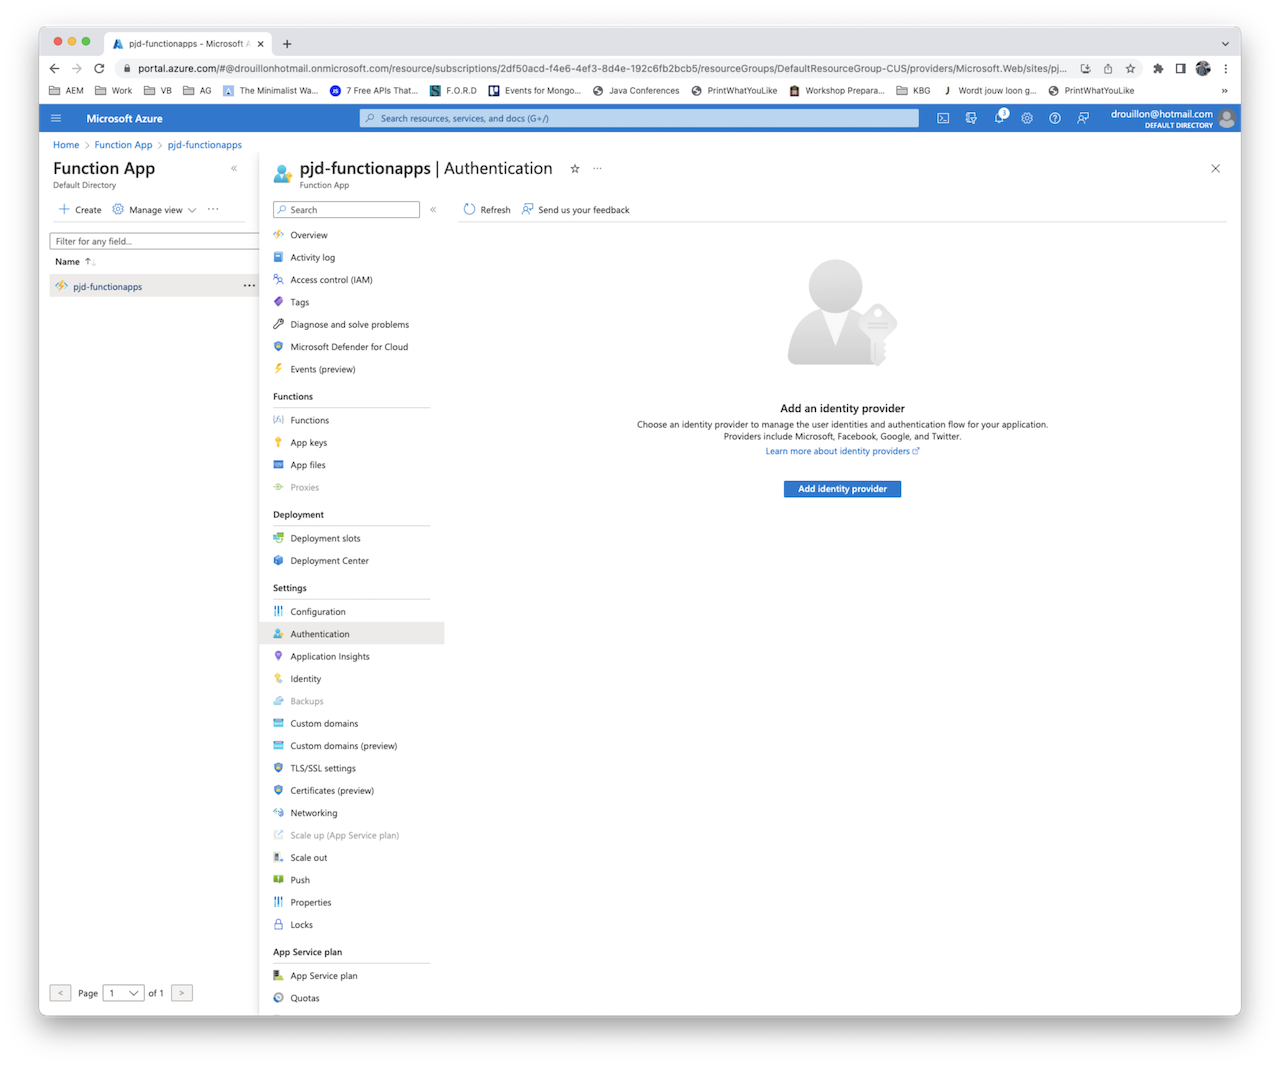
Authentication is added on the Function App, not the function itself; so it is all or nothing
-
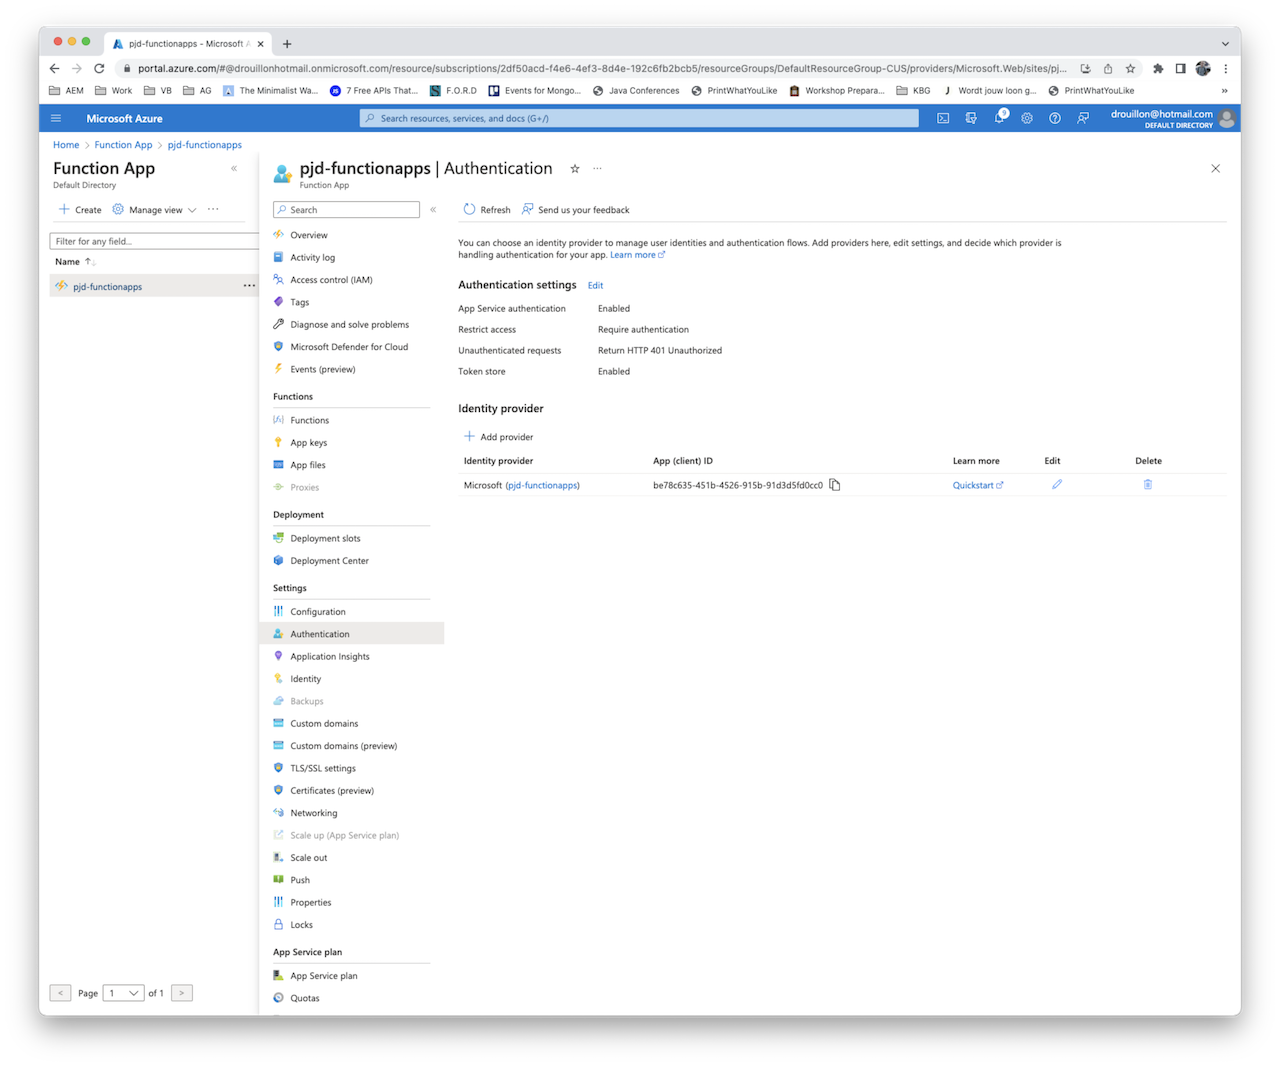
go to the function app, select Authentication on the left menu
-
Click the ‘Add identity provider’ button. In my case, I added the Active Directory resource, so I’m using the Microsoft Identity provider. You can go for the default setting, except for the unauthenticated request part: I changed it to
HTTP 401, as the function I build previously is a Rest API. Click the ‘Add’ button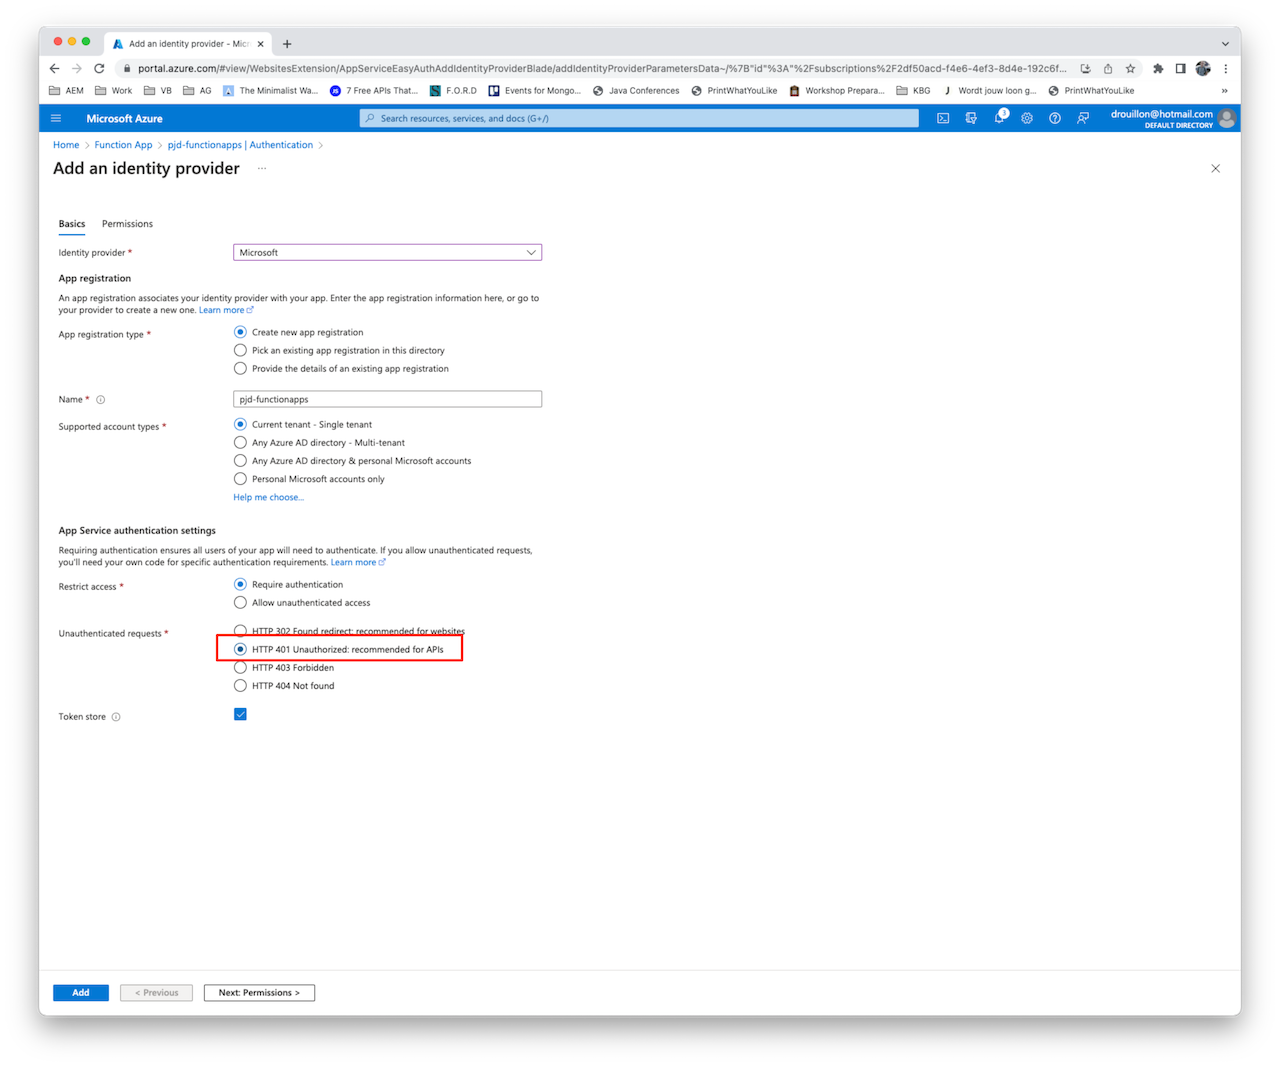
-
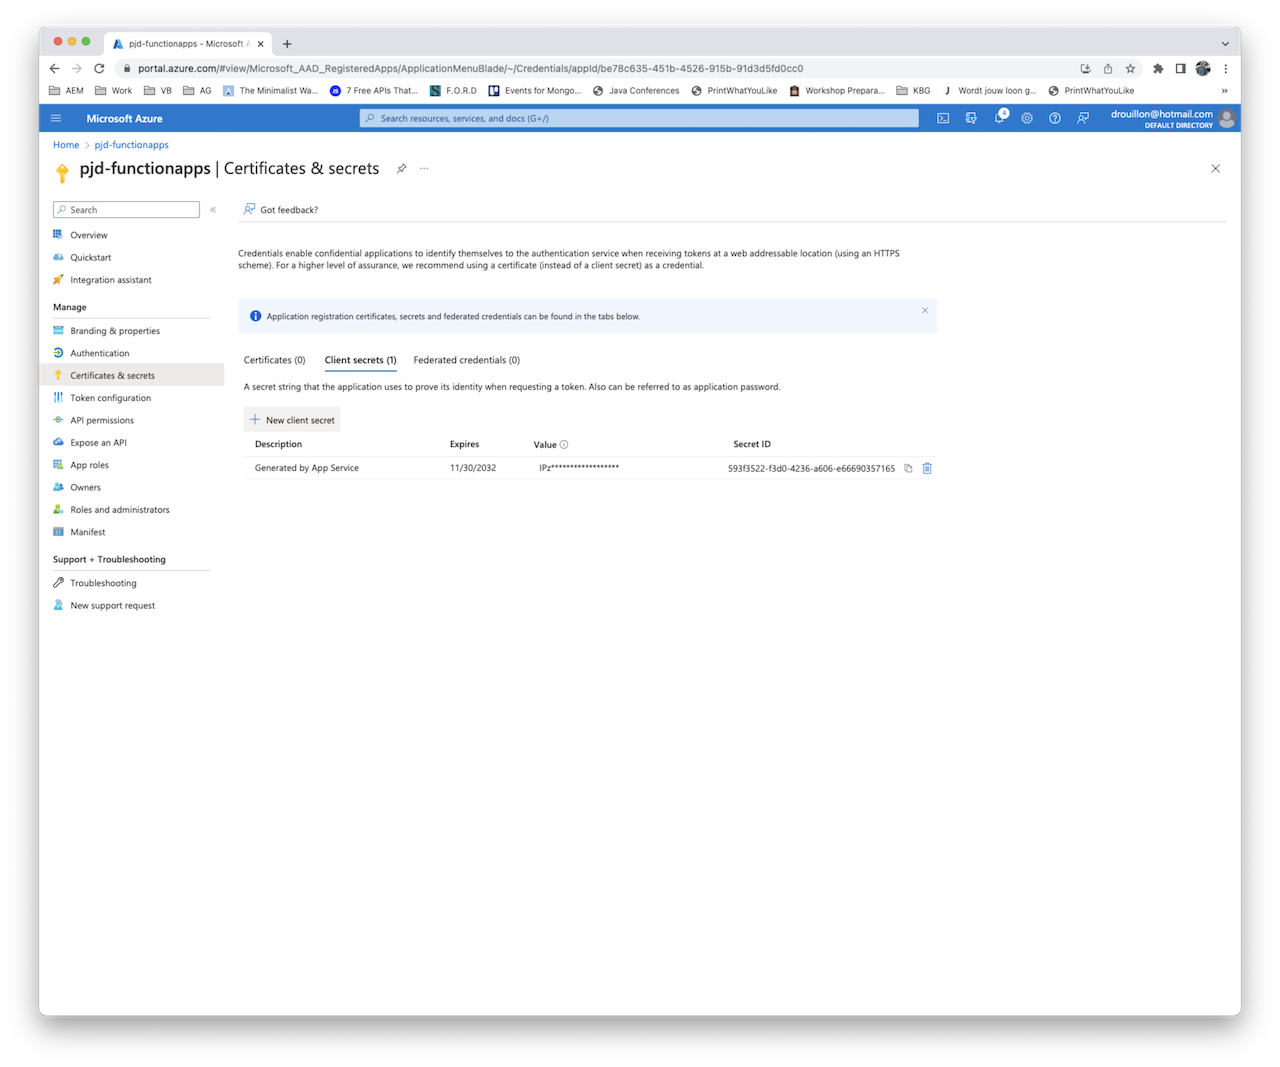
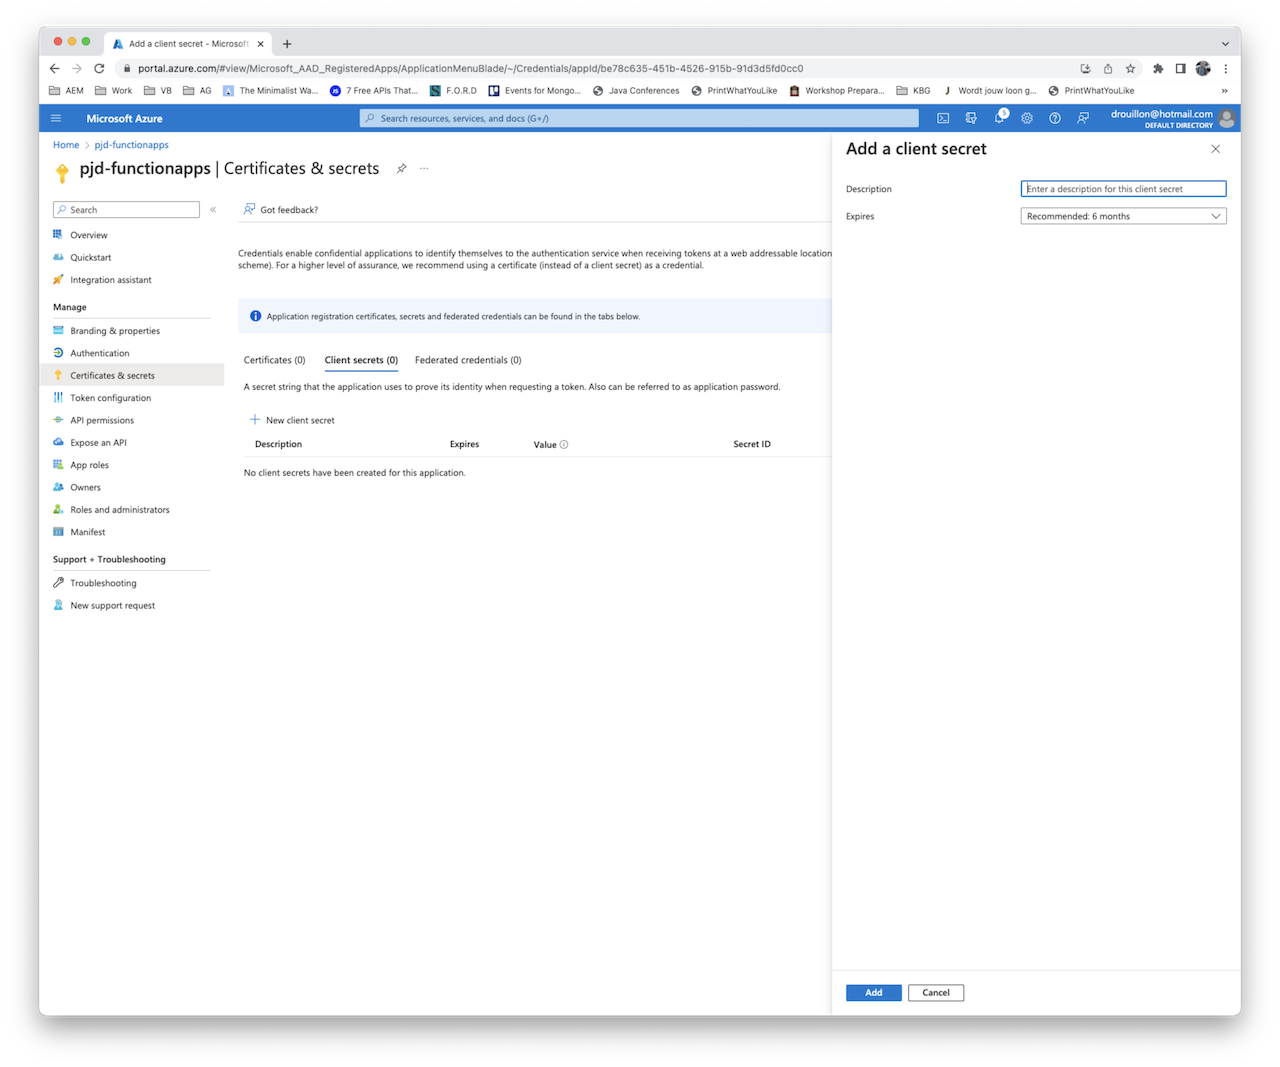
Reset the client secret. It is automatically generated but you did not get the actual value and there is no way to retrieve it. I think this is a bug - a workaround is to delete the existing one, and generate a new one.
-
Write down the value and secret id that has been generated!
-
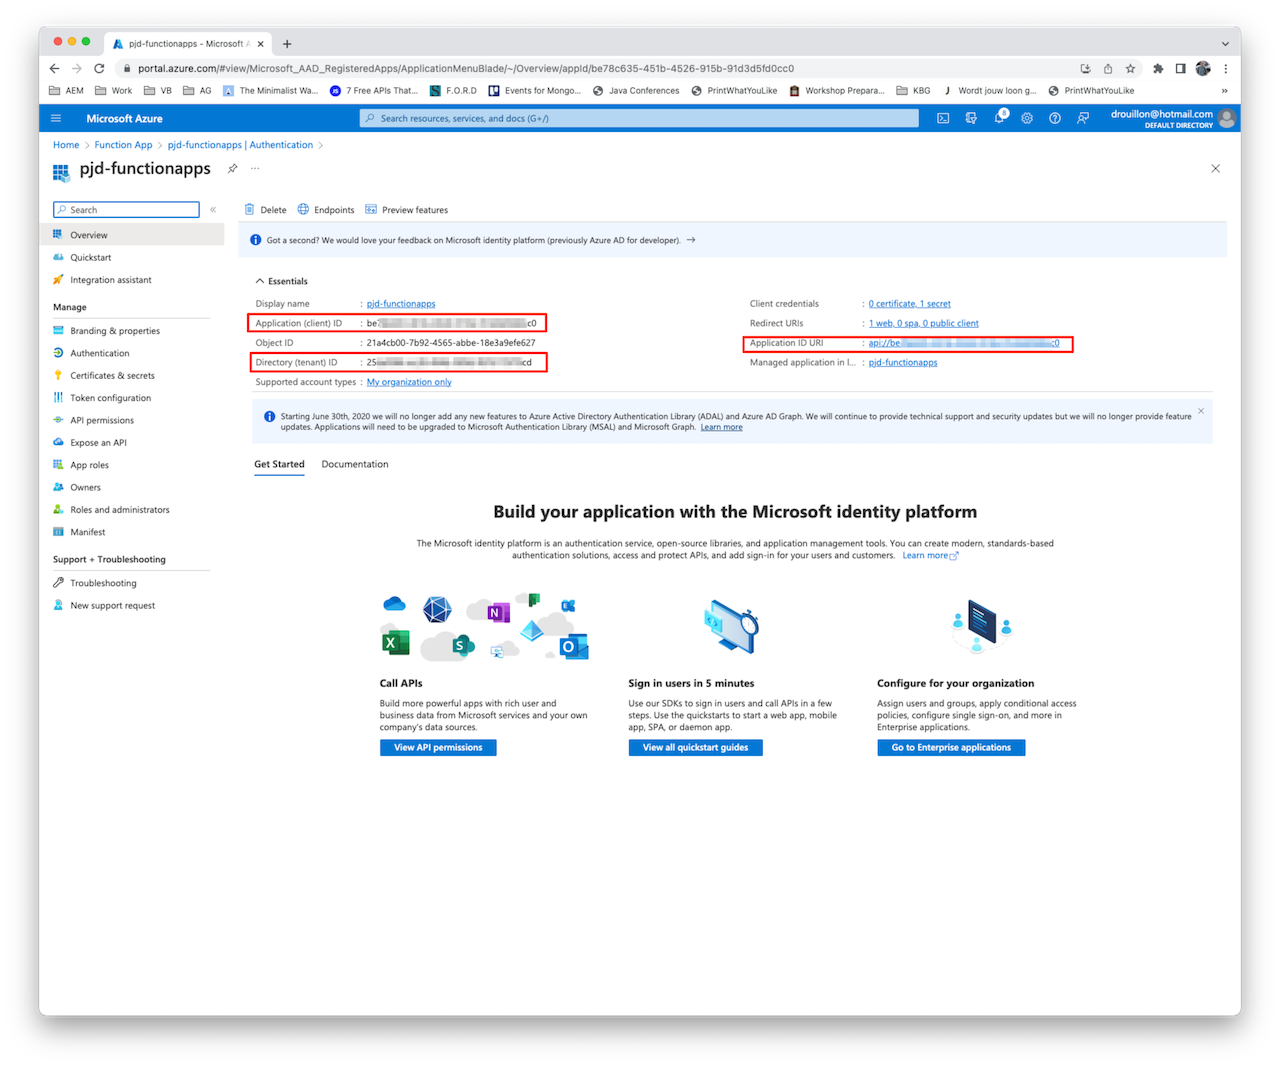
Go to Authentication detailpage of the provider you have added, and write down the Application (client ID), tenant ID and the Application ID URI as you will need it later on
-
Now let’s define the API permissions (select your Function App > Authentication in the left column > select on the identity provider you added). Click on Edit (next to quickstart)
-
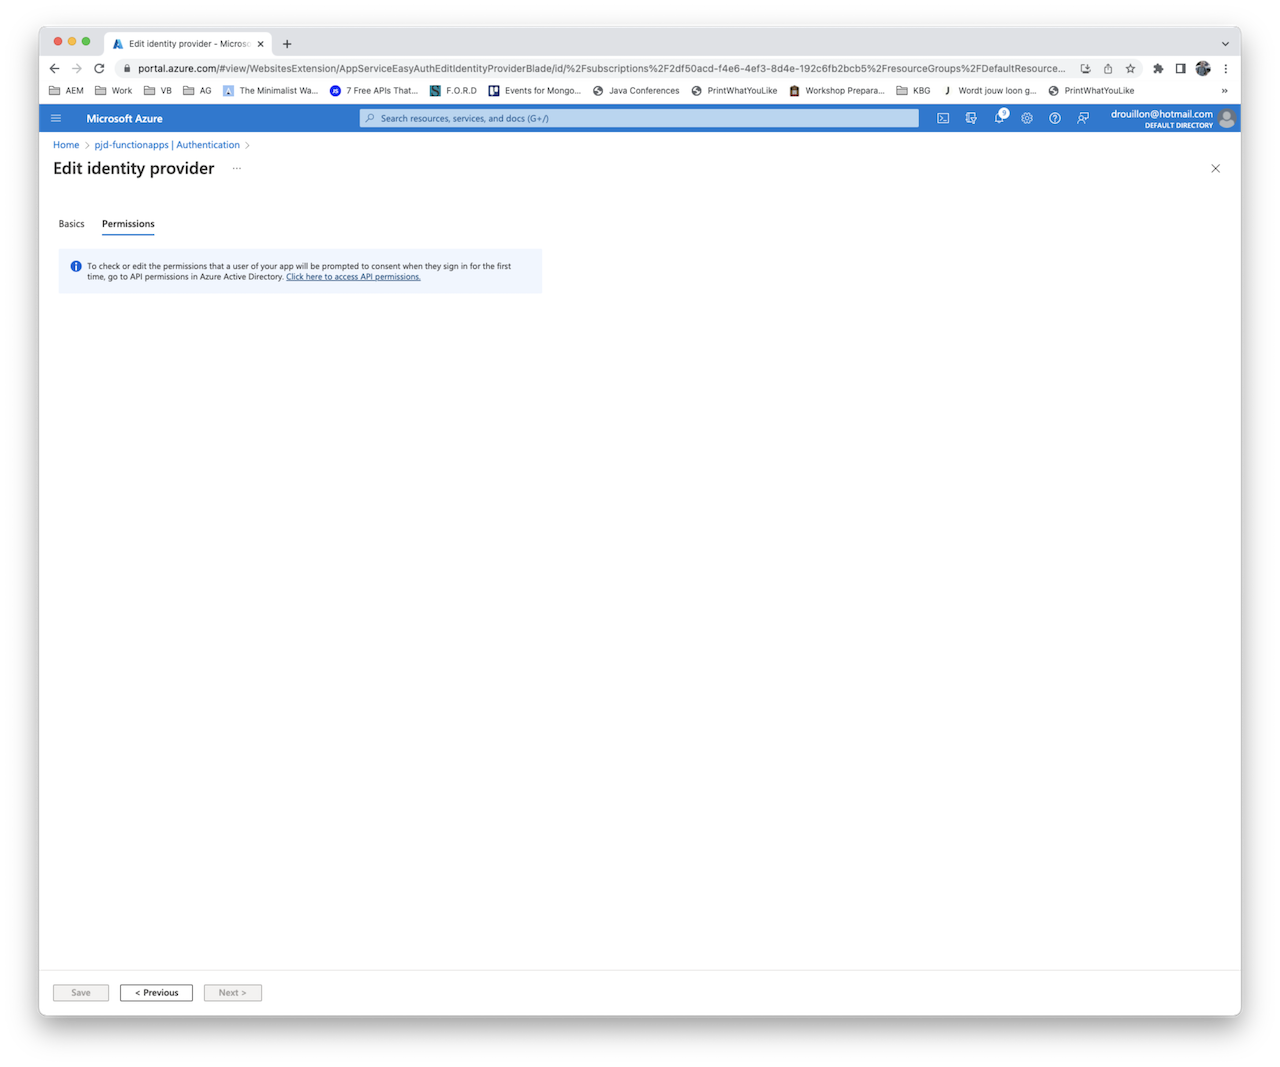
Click the Permissions tab, next click on the ‘Click here to access API permissions’ link
-
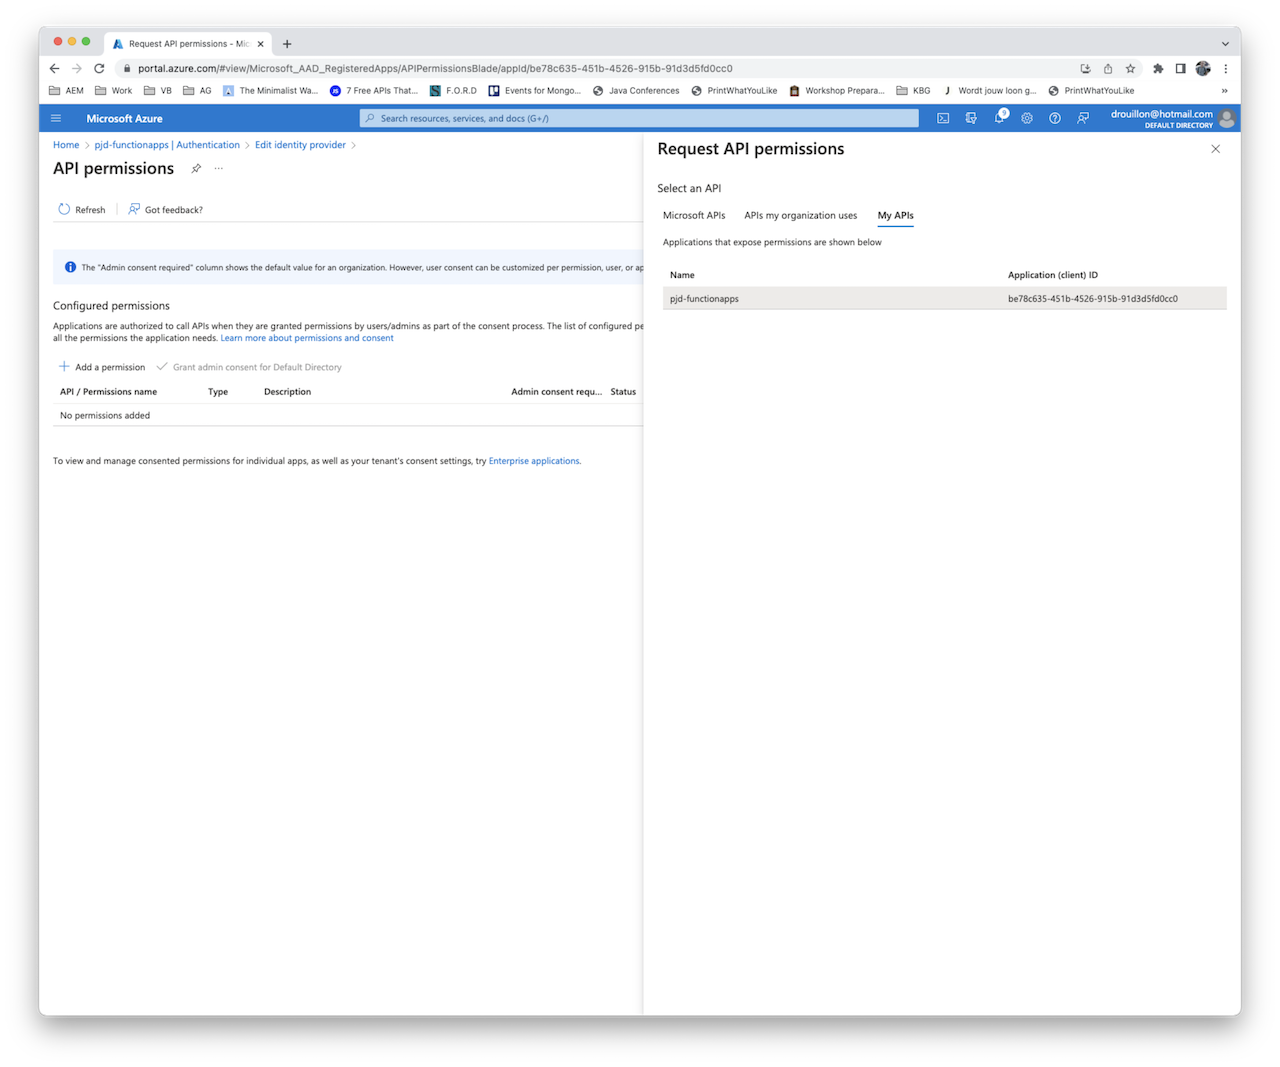
Click the ‘Add a permission’ button. In the right hand side, click on ‘My APIs’ - your function apps should be in the list. Click on it
-
Check the box for the only permission that will appear (access
<name of your function app>)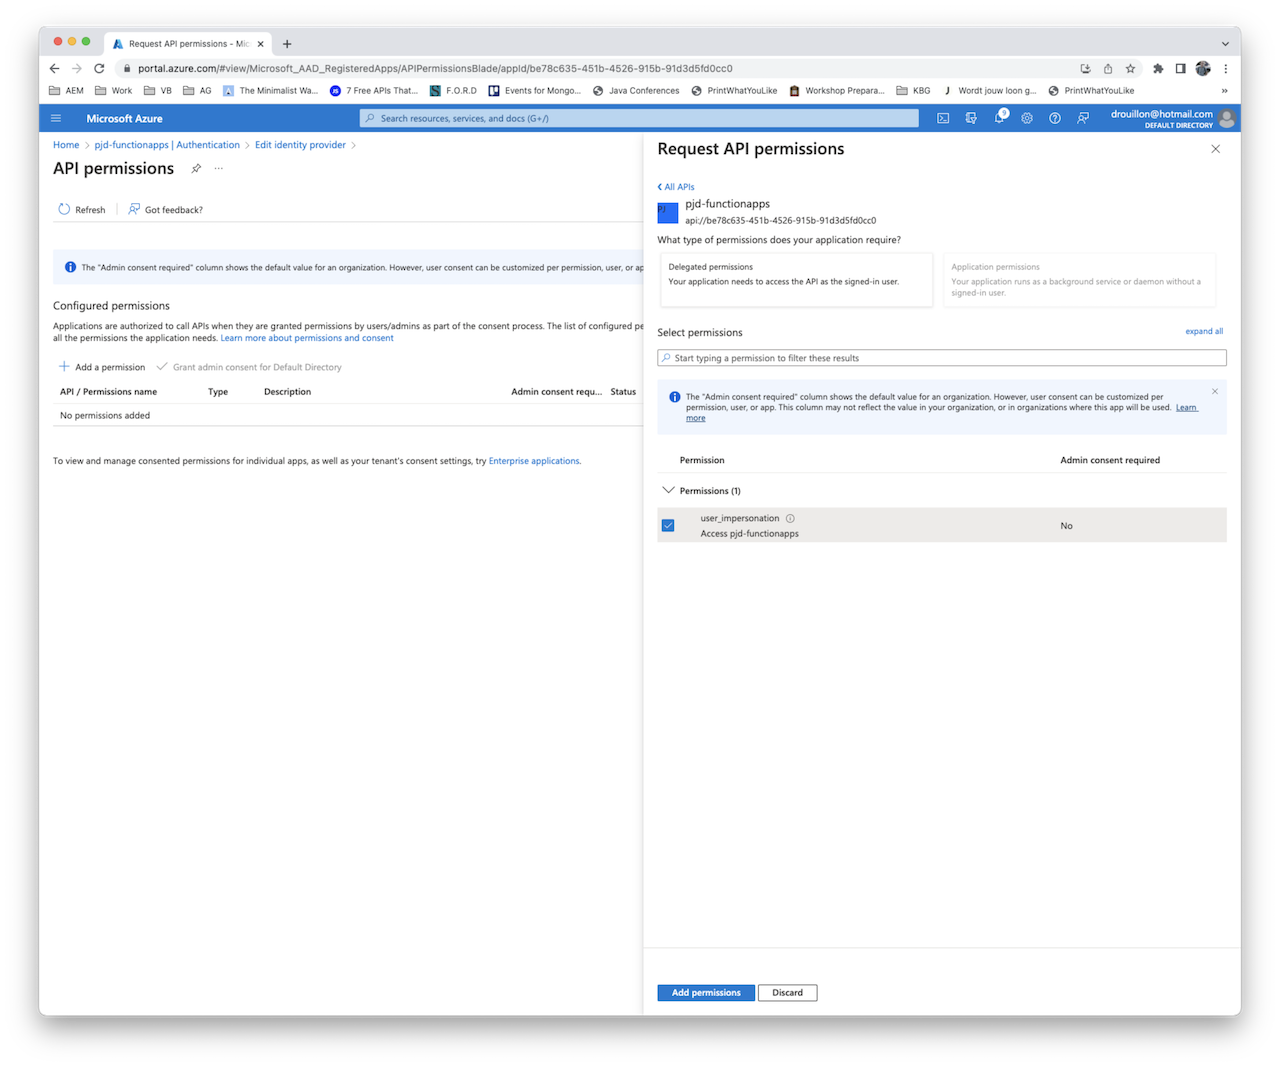
-
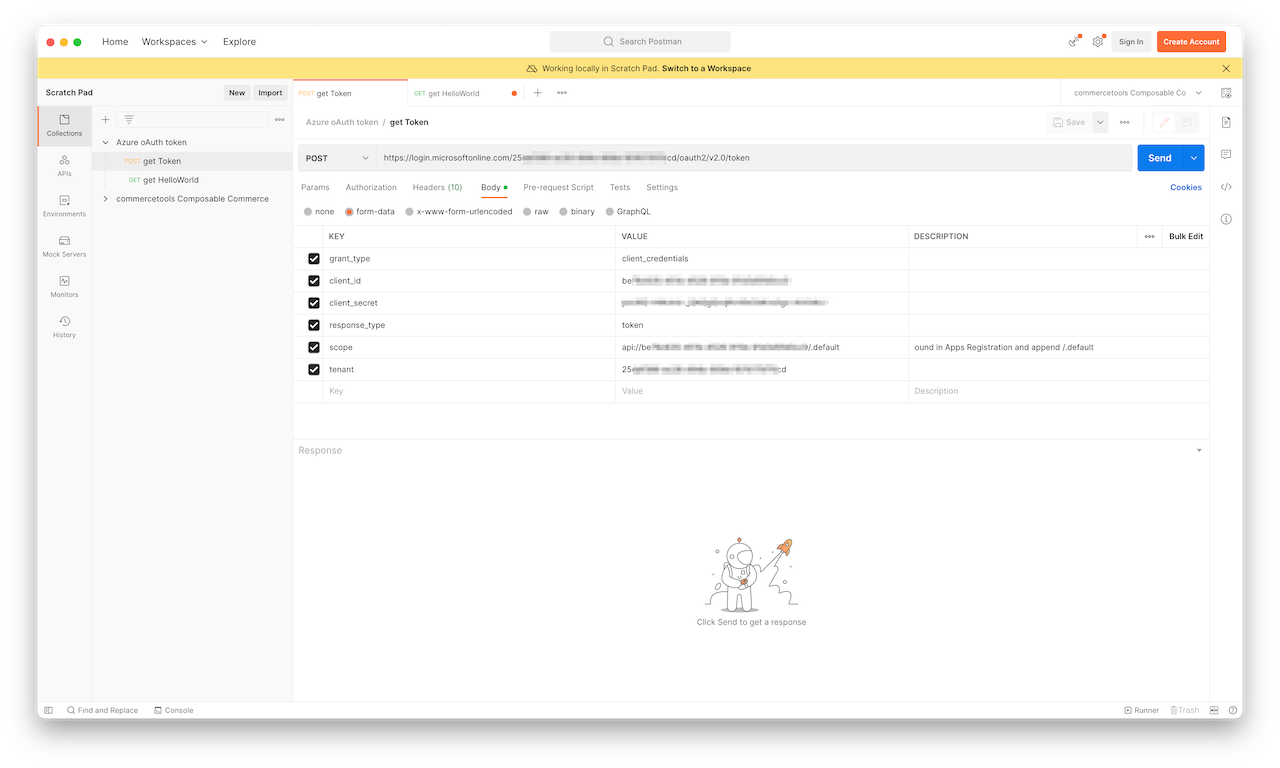
Now we have everything we need to fetch a token. Open postman and fill out the following info:
- endpoint is
https://login.microsoftonline.com/<tenantId>/oauth2/v2.0/token grant_typeis a hardcoded value, we wantclient_credentialsclient_idis the Application(client) IDclient_secretis the secret linked to the Application(client) IDresponse_typeis a hardcoded value,tokenscopeis the application ID URI, suffixed with/.defaulttenantis the tenant id, the same that is part of the endpoint
- endpoint is
-
The bearer token you get back can then be used to call the Function endpoint in the
Authenticationheader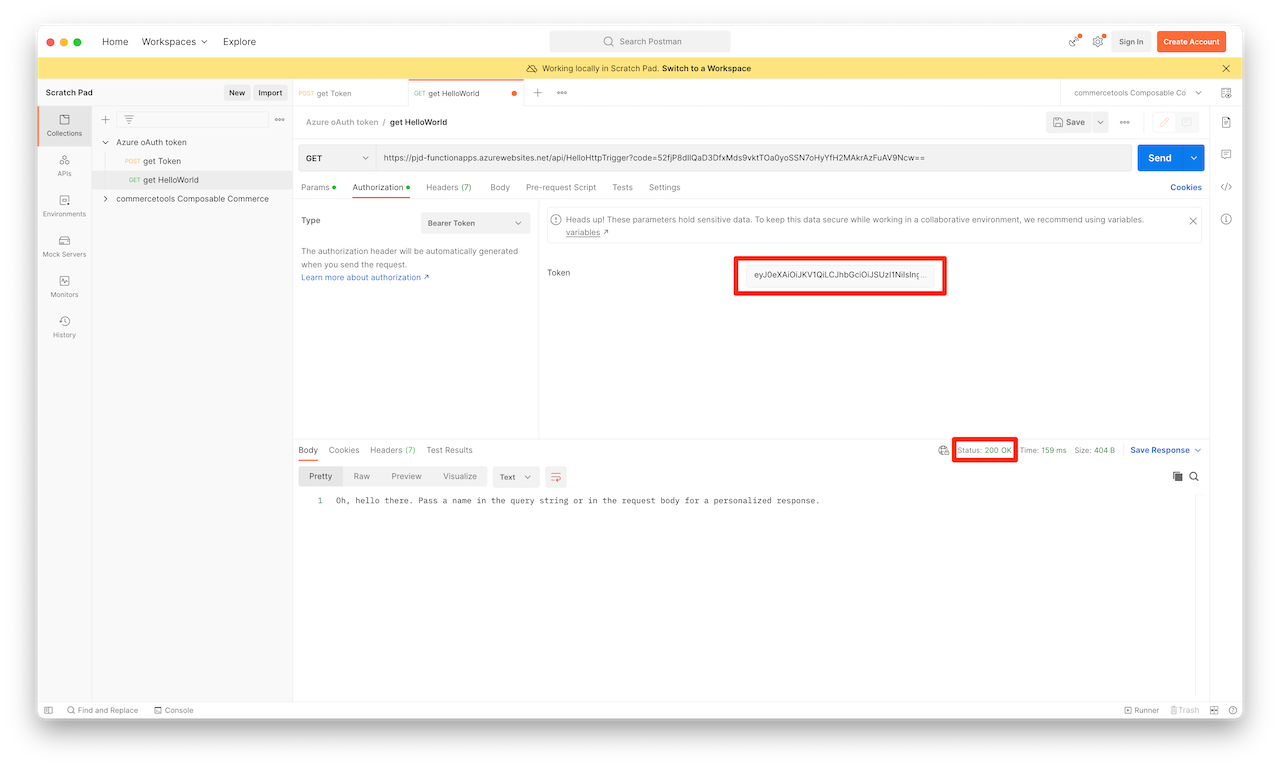
Bonus: request headers
Out of curiosity, I wanted to know what headers were being added to the request that hits the function. So I’ve updated the script as follows:
- set the
Content-Typeof the response toapplication/json - updated the body to an actual JSON object
module.exports = async function (context, req) {
    context.log('JavaScript HTTP trigger function processed a request.');

    const name = (req.query.name || (req.body && req.body.name));
    const responseMessage = name
        ? "Hello, " + name + ". This HTTP triggered function executed successfully."
        : "This HTTP triggered function executed successfully. Pass a name in the query string or in the request body for a personalized response.";

    context.res = {
        body: {
            msg: responseMessage,
            reqHeaders: req.headers
        },
        headers:{
            'Content-Type': 'application/json'
        }
    };
}
Below is an example of the response I got - I replaced sensitive information with <removed>:
{
    "msg": "This HTTP triggered function executed successfully. Pass a name in the query string or in the request body for a personalized response.",
    "reqHeaders": {
        "accept": "*/*",
        "accept-encoding": "gzip, deflate, br",
        "authorization": "Bearer <removed>",
        "host": "helloworld-pjd.azurewebsites.net",
        "max-forwards": "9",
        "user-agent": "PostmanRuntime/7.29.2",
        "postman-token": "ffa9045a-4a58-4aed-8742-a4c532802c30",
        "x-arr-log-id": "1cc22798-ae88-4671-a34a-83df04ad9d30",
        "client-ip": "<ip with port>",
        "x-site-deployment-id": "helloworld-pjd",
        "was-default-hostname": "helloworld-pjd.azurewebsites.net",
        "x-forwarded-proto": "https",
        "x-appservice-proto": "https",
        "x-arr-ssl": "2048|256|CN=Microsoft Azure TLS Issuing CA 01, O=Microsoft Corporation, C=US|CN=*.azurewebsites.net, O=Microsoft Corporation, L=Redmond, S=WA, C=US",
        "x-forwarded-tlsversion": "1.2",
        "x-forwarded-for": "<ip with port>",
        "x-original-url": "/api/HelloHttpTrigger?code=<removed>",
        "x-waws-unencoded-url": "/api/HelloHttpTrigger?code=<removed>",
        "disguised-host": "helloworld-pjd.azurewebsites.net",
        "x-ms-client-principal-name": "<removed>",
        "x-ms-client-principal-id": "<removed>",
        "x-ms-client-principal-idp": "aad",
        "x-ms-client-principal": "<removed>"
    }
}